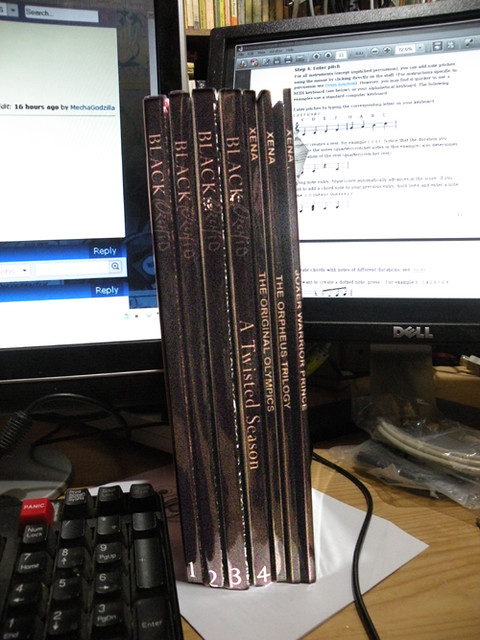
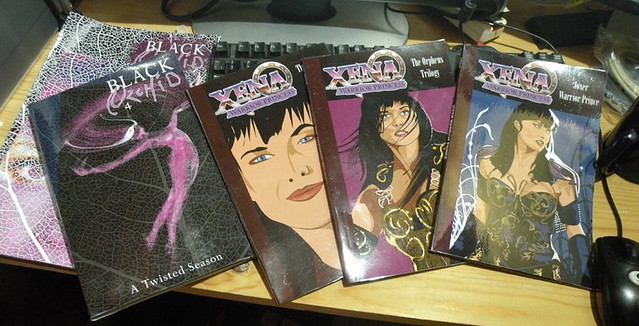
Post by junkmonkey on Jan 4, 2015 20:30:45 GMT -5
Hi,
For a while now I have been experimenting with binding comics into books. A couple of people at the Introduce Yourself place suggested I start a thread. If this is the wrong venue could a mod move it somewhere more appropriate please?
The way I do it (ooh er, missus!).
First thing to do is to ruin the comic book: open it flat at the centre pages and punch six holes right through the spine. I use a small bradawl which I filed so it has a point rather than a flat end.
Whatever you use, it should makes a round hole in the paper not a slot. I punch through onto a scrap piece of hardwood and to make sure all my holes line up I use a template: A piece of A4 paper folded in half with holes in it.
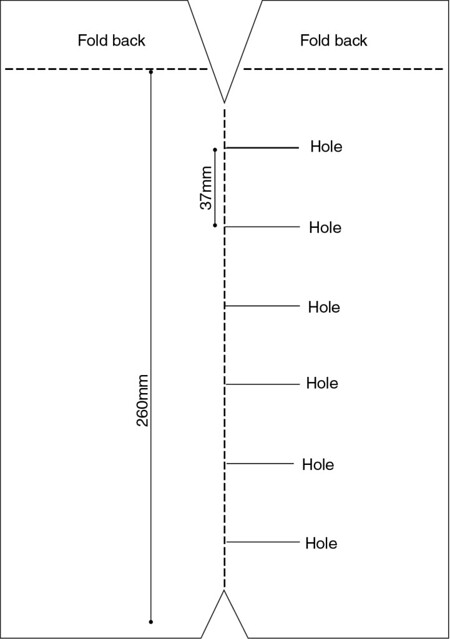
To make the template: Measure a horizontal line 260mm from the bottom of a piece of A4 paper and fold the top back along the line. Fold the paper in two vertically (i.e. at 90 degrees to the fold you just made.)
Undo the second fold and mark at 37mm interval down the centre line. Punch holes at these marks.
Redo the fold and make two diagonal cuts from the top and bottom edges into the fold (making sure obviously that they do not cut off any of the holes you just punched.)
Opened out the template should look like this:
To use: Hang the folded back sections over the two sides of the opened comic, making sure the centre fold in the comic lines up with the fold in the template - that's what those two triangular cut outs are for. Punch through the template and comic with bradawl. Check to make sure nothing slips as you move to the next hole. It's a wee bit tricky at first go but after two or three comics it's pretty easy.
Place the comics in order. You don't want to bind them the wrong way round or at random. (Keep checking as you sew. I once had to completely redo a book because I got the comics in reverse order.)
Right that's the comics ready to sew.
I like to sew with a thick waxed thread and a large sewing needle. Take a length of thread equal to the length of all the spines of your pile of comics. If your comics were lined up in a line, tops to bottoms, that how long the thread wants to be. I don't get antsy about this, I just pull the thread past a comic X number of times and cut it off. I always end up with too much on my needle but that's better than running out three quarters the way through the job.
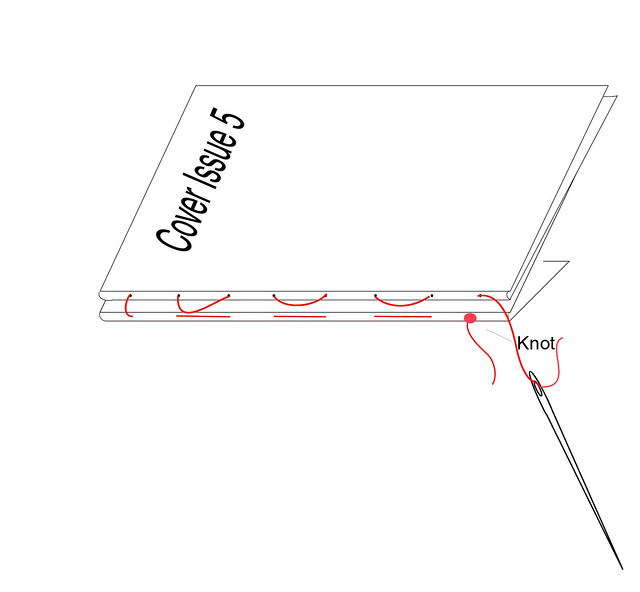
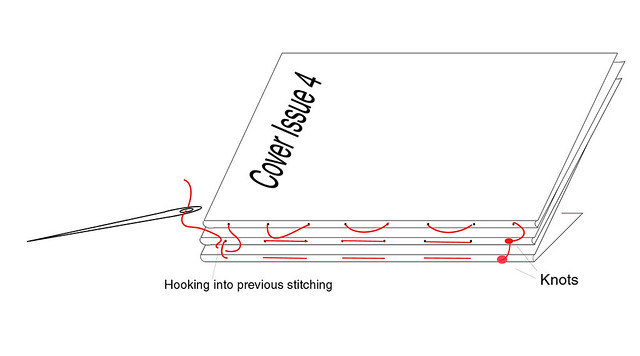
Tie a knot 30+mm from the end of the thread. Take the largest numbered comic in the series (i.e. if you are binding a six episode series start with #6)
Starting at one end (it doesn't matter which) push the needle with the thread in from the spine into the centre pages through one of the punched holes.
Pull the thread through till the knot reaches the outside of the spine of your comic. The knot should stop the thread from pulling through as you work.
Remove the staple nearest the thread. I use a pair of very narrow nosed tweezers and bend the arms back till its a I__I shape before pulling it out but whatever you do be careful not to rip anything. This for me is often the trickiest most fiddly bit of the whole operation. (If you wanted to you could remove the staples holding the comic together at any point but I prefer to hang on till I've started sewing them. The thought of accidentally dropping a pile of comics with nothing holding the pages together is too much to contemplate.)
I find it is easiest to do all this sat down with the comics laid flat on a table top before me with the spine facing me. I usually have something bulky to place in the centre of the comic so I don't have to keep finding the centre pages when I pull the thread back out.
Staple out, poke the needle and the thread out through the next punched hole and then back in through the next... in and out till you get to the top.
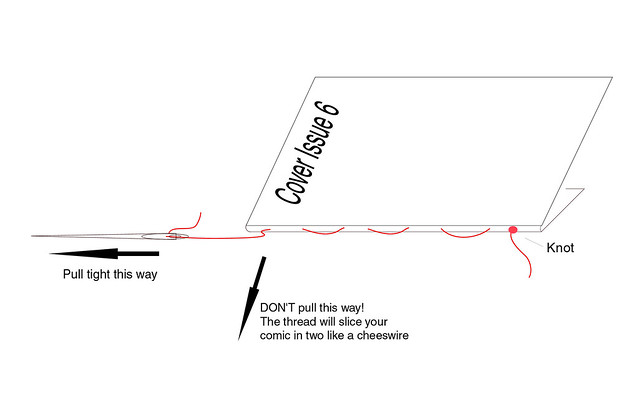
Remove the second staple when it's convenient. Don't be tempted to pull the stitches tight as you go! Wait till you have reached the end of the book and then pull away from the comic along the line of the spine. Like this:
Once the thread is tight, get the second comic (issue #5 in this case) place it on top and stitch back the other way.
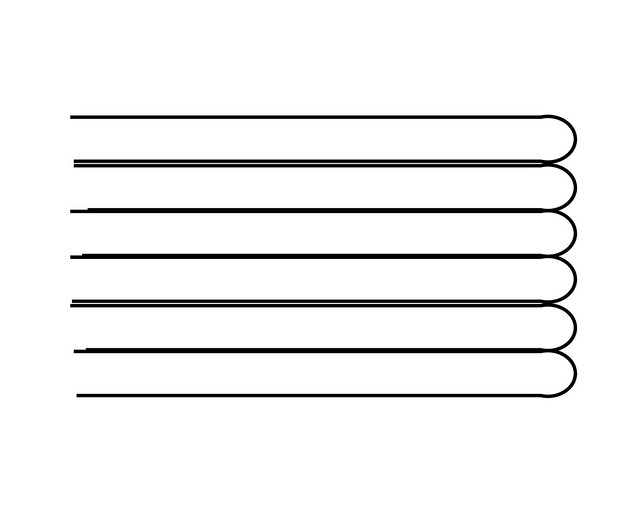
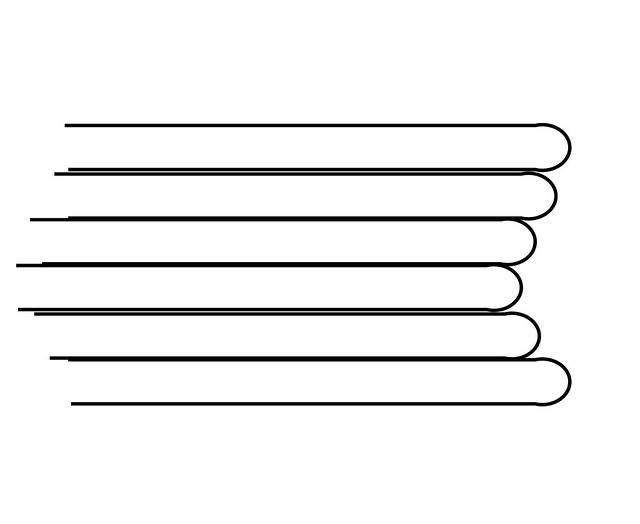
Once you get to the end of the second comic pull the thread tight making sure not to cheese-wire your comic (I've done it. It hurts!) and making sure the two comics are pulled together - but don't pull too tight. When you have finished making your book you want the individual comics to be sat neatly like this:
Not like this (which is what sometimes happens if you over-tighten at this stage):
Tying them together too tightly doesn't give you much room to move later on. On the other hand you don't want them so loose they are flopping about. It gets easier to judge just how tight to tie them after a few tries.
Once you're happy with the tightness of the thread on the second comic, tie the thread from your needle to the 30mm tail hanging from where you started on the first comic.
- and get going on the next one (issue #4)
When you get to the end of the third comic pull the thread tight and hook the thread into the thread between comics 1 and 2.
And start on the next book. Keep going like this till you run out of comics. (EDIT: Just realised I have missed out a line from the above diagram. There should be a trailing end of thread coming from the second knot. As you go up the pile keep tying onto this trailing end when you've stitched back to it every second comic.)
Gluing:
Clamp the sewn comics between two boards - I've been using carpenters' quick release clamps and two pieces of wood that came off the side of an old drawer wrapped in plastic from a cut up carrier bag. Real high tec stuff.
The trick here is to get the comics as neatly lined up as possible. Square and lined up and tightup to the edge of the boards so that the glue that is about to be applied doesn't go on the covers. Again took me a few goes before I got it - and I was glad I started with only binding three issue runs together.
Once they are clamped to my liking I paint the spine with a generous helping of PVA and leave it to dry.
I know that all sounds complicated and a real faff but even after only a dozen or so books I had that whole malarky down to about half an hour for a six issue binding.
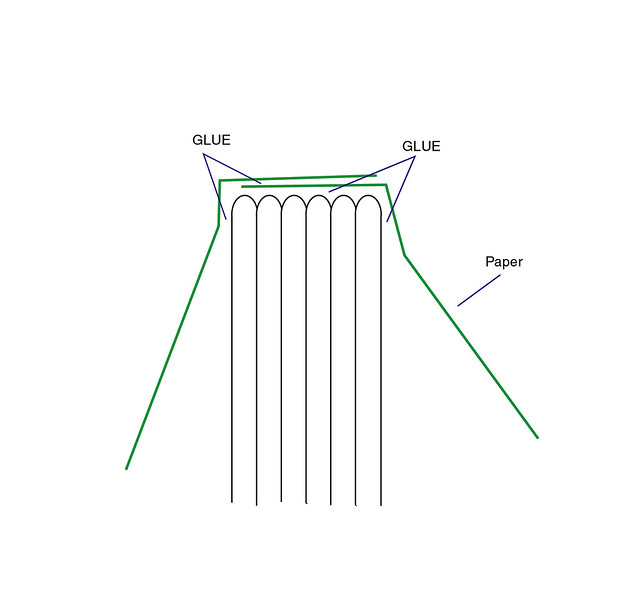
Once the glue has dried - I may apply two or three coats depending on how I feel - I unclamp the book and glue on a couple of endpapers. This isn't essential but it makes the book feel more like a book rather than just a bunch of comics glued together. I use a couple of sheets of dark A4 paper. I make a fold down one edge of each sheet of paper the width of the bound book block (6 issues is about 12mm) and glue them to the spine and just around the corner onto the covers.
Then clamp them again.
That's the book's core made.
The cover:
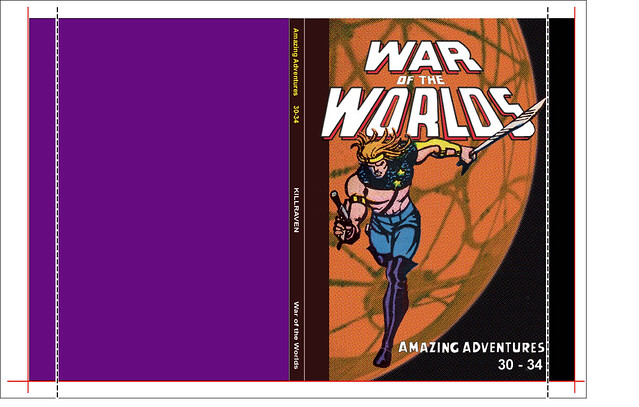
Photoshop: I make an image 260mm high (the hight of a comic book) and as wide as I can get onto A4 (about 208mm) I know this is wider than a comic but I'll get to that - but, for starters, the spine (for a 6 issue binding) will take up 12mm the rest we will come to later.
Endless hours of dicking around with Photoshop and/or Illustrator later (and I can guarantee that, during this time, my 12 year old daughter will lean over my shoulder and show me at least one three keystroke short cut that I had never seen before which would have saved me hours) I will have a cover. This will be wider than a comic and have slightly off-(to the left)-centred lettering.
Print the cover on thick paper. It doesn't have to be card stock, thick paper will do. With the smallest pieces of tape possible tape the printed cover to a coloured piece of similar thickness paper. This will be the back cover. If you can put the tape right at the edges where they will be cut off later so much the better. For reasons that will be immediately obvious I make up covers two at a time.
Once I have two covers I place them back to back and run them through my A3 laminater. (This whole process would be a lot easier if I had an A3 printer but I don't.) Once the covers are laminated - sometimes I have to run the covers through a couple of times before I'm happy that a good bond has been made - I cut round the covers as close to the edges as possible and peel the two side apart. What I end up with is two covers, each laminated on one side.
Cut off the bottom and side waste material from the cover - I don't do this when separating the covers because I might slice into the other cover backing onto it. (I don't print out the red and dotted lines shown on the diagram, I just put them in here to make things clearer - and I wouldn't use such a crappy colour for the back cover either - ditto explanation.) Cut where the red lines are. Don't cut the top. Bend the cover (along the line I carefully worked into the front cover design at the edge of the spine) and along the join between the printed cover and the back plain cover. Glue the book in the groove lining it up with the bottom (cut) edge and prop up on its spine to dry.
When dry, lay the book flat and, with pencil and ruler, mark round the comics and trim the end papers and the top edge of the cover only. Not the sides. (Turning the book over half way through helps.)
Mark edges of the cover on the inside to fit (around where the dotted lines are in the diagram and a millimetre or two beyond the edges of the comics) and bend along the lines bringing the surplus cover back inside towards the book. This is why the cover art was wider than it needed to be - to make these flaps. Glue the insides of the flaps and clamp the book up again using plastic sheet inside the covers to stop any glue getting where it shouldn't. (The comic bags the comics that you are binding come in really useful here.) Folding the flaps back like this stops the covers from curling and just makes the thing feel so much more substantial. Almost like a real book.
Done!
Any suggestion, comments, and improvements?

